Monday, August 31, 2015

What to Do If Your Home Isn't Selling

In a strong market, if a home is priced right and shows well, it should sell within the first six weeks. If it doesn’t, many sellers become frustrated, especially if their agent begins pushing for a price reduction.

It’s a common rub: the seller thinks the agent just wants a quick sale, but the agent sincerely wants to help the seller get action. Agents understand that a listing loses momentum and excitement soon after being listed. Buyers will think of a home as stale, tired, or flawed if it sits on the market too long. Here are some ways to get more traction if your home is not generating offers.

Location, price and condition are key

You can’t change your home’s location, but you do have some control over the other two important buyer considerations. If the home is still sitting on the market after a few months, and especially if it has had no showings or offers, you need to look at the price and the condition.

You have two big choices to make if you are ready to sell. The first is to take the home off the market and make some changes, such as staging, de-cluttering, and altering the look of the kitchens and bathrooms.

If you are getting specific feedback about one part of the home, change it. A few months off the market will ensure that, when it comes back on, there will be a new set of buyers taking a look at your fresh listing.

If you are unwilling to make the needed changes to the home, the other option is to reduce the price. I recently visited with sellers who built a brand new beautiful home with excellent finishes and fixtures. But after four months, they only had two showings, and in a market where homes were selling with multiple offers within weeks.

The issue was the location. It was the absolute best home on a very tough block, and the setting was not private. In this case, the sellers had no choice. There was no moving or improving the house. The only option was to drop the price.

The sellers opted to take the home off the market and rent it because they were not ready to sell at the recommended price.

Make sure you and your agent are on the same page

If you and your agent don’t see eye-to-eye on the pricing or sales strategy prior to listing, it might be time to find another agent.

You want an agent who has your back and who is on the same page as you. Without that synergy, you could be in for unnecessary conflict six weeks in.

Discuss your intentions with your agent upfront, and listen to her feedback. A price reduction or low offer shouldn’t come as a surprise. But if the home isn’t selling, and the seller wants to see action, a good listing agent will ask for offers, follow up with interested parties, and let them know that the seller wants to sell. Reducing the listed price may not be necessary if there’s a buyer who understands that the seller will entertain an offer below the asking price.

You may have to see firsthand how the market works. If you list your home at a lower price than you’re comfortable with, you may be sorry if you get offers right away. But if you price it higher and don’t get any response after some time, then you will see the market speak for itself. I’d much rather have seller clients in the latter situation than the former.

Every scenario is different, and it’s so important to work with an agent who is in synch with your strategy and can help you adapt to your market.

Related:

Note: The views and opinions expressed in this article are those of the author and do not necessarily reflect the opinion or position of Zillow.


from Zillow Blog - Real Estate Market Stats, Celebrity Real Estate, and Zillow News http://www.zillow.com/blog/what-to-do-if-your-home-wont-sell-182717/
via Reveeo

Tracy Morgan & His New Wife Reportedly Buy New Jersey Manor

shutterstock_307879865Tracy Morgan’s going to be living every week like it’s Shark Week - in his new manor with his new wife.
The “30 Rock” favorite is doing all kinds of living it up these days. After being critically injured in a car accident last summer, he has recovered enough to host “Saturday Night Live” in October. He also just married his longtime girlfriend, Megan Wollover, and bought a $13.9-million bauble in mansion form in swanky Alpine, NJ, the New York Post reports.

The 21,000-square-foot colonial home boasts 7 bedrooms, 10 bathrooms and many opportunities to exercise with a gym, swimming pool and racquetball court.

There’s an elevator for getting around, plus front and rear stairs and a six-car garage where Morgan can park his wheels after the 35-minute drive from 30 Rockefeller Plaza.

The newlyweds can enjoy movies in the privacy of their own screening room, roll their own game in the two-lane bowling alley or walk the two-acre, manicured grounds.

The listing agents were Dennis and Dolores McCormack of Prominent Properties/Sotheby’s International Realty.

Related:


from Zillow Blog - Real Estate Market Stats, Celebrity Real Estate, and Zillow News http://www.zillow.com/blog/tracy-morgan-buys-nj-manor-182640/
via Reveeo

5 Ways to Get to Know Your Neighbors

For many of us, leaving friends and neighbors behind can be the toughest part of moving to a new home. These five tips will help you make connections and settle into your new community in no time.

1. Knock, knock

For an extrovert, walking over to a neighbor’s home to say hello may feel like a no-brainer. But for more reserved personalities, this tried-and-true method usually requires a bit of warmup. Start with a friendly wave as you drive by, then work your way up to a face-to-face introduction. Remember, timing is everything. You don’t want to disturb your neighbors in the middle of dinner or while they’re struggling to get a fussy toddler down for the night. Try to catch them when they’re already outside, or aim for a weekend afternoon when everyone is much more likely to be relaxed and open to a brief, friendly chat.

2. Snail mail

Can’t work up the nerve to knock on doors? In this age of electronic communication, a nice handwritten note can be a welcome surprise. Write a few lines for your closest neighbors introducing yourself and inviting them over for a cup of coffee or cocktail at their convenience. Be sure to personalize each note by including a small conversation starter - the roses in front of your home are absolutely stunning; we’re poodle-lovers, too! - then drop your letters at your neighbors’ front doors or in their mailboxes.

3. Magic school bus

If you’ve got school-age children, accompany them to the bus stop for the first few days of class. You’re likely to run into at least one other parent who can fill you in on both neighborhood and school happenings - and people love to talk about their kids, so you won’t have to worry about awkward silences and finding common ground. Exchange contact info and invite the family over for some weekend fun.

4. Man’s best friend

Our pets often are the friendliest members of the family! Let your four-legged companion break the ice for you. Dog parks are a natural spot for meeting new friends, both canine and human. You can also meet fellow pet lovers while walking your dog through your neighborhood - cleaning up any messes, of course. You can get recommendations for trails, vets and parks, as well as ask about any pet-themed meetups in the area.

5. Turn the page

Don’t let the name fool you: Book clubs are as much about socializing as they are about reading. Check out your library or local bookstore for groups near you, or you can find one online. If possible, contact the host ahead of time to ask whether you should bring any refreshments (wine!) and come armed with a few key insights about the book and recommendations for the following go-round. Who knows? You could pick the next talk of the town.

Bonus: Life of the party

Once you’ve made a few connections, team up to host a neighborhood block party. Volunteer to handle snacks and other logistics, and ask your more-established neighbors to spread the word. Pick a seasonal theme - hot dogs and lemonade for summer, cookies and warm cider for fall - and spend an afternoon meeting new friends and getting the inside scoop on the best places to eat and play near your new home. Before you call it a day, pass the torch to another neighbor and make the block party a new tradition.

Related:


from Zillow Blog - Real Estate Market Stats, Celebrity Real Estate, and Zillow News http://www.zillow.com/blog/get-to-know-neighbors-182407/
via Reveeo

Friday, August 28, 2015

'The O.C.' Mansion on the Market for $6.25M

This is how listings are done in Orange County.

Actually, this home from the cancelled teen drama series “The O.C.” is in Malibu - but it belonged to the fictional Cohen family in Orange County, and was the adoptive home of stoic bad boy Ryan Atwood. It’s listed for $6.25 million, as first reported by Trulia.

Rock out to Journey like Ryan in one of the gated villa’s 6 bedrooms, or primp in one of its 6 bathrooms.

Although the home was filmed mostly from the outside, its 6,376-square-foot expanse is plenty big for all your high school parties.

Ocean and parkland views are visible from giant windows in almost every room, and from the master suite’s balcony.

Situated on more than four acres, the home exudes luxury inside and out, including fireplaces in the living and family rooms as well as the master suite, plus an infinity pool and spa in the yard - for seeing and being seen.

To help you avoid being seen by the wrong people, the property boasts a six-camera security system.

The listing agents are Amy Alicini and Jeffrey Thompson of Pacific Palisades Brokerage/Sotheby’s International Realty.

Related:


from Zillow Blog - Real Estate Market Stats, Celebrity Real Estate, and Zillow News http://www.zillow.com/blog/o-c-mansion-on-the-market-182549/
via Reveeo

3 Home Upgrade Options for a $3,000 Budget

The top priority for most buyers when house hunting is function. While charm and character go a long way, they can’t overcome a bad layout, lack of storage, or a poor use of materials.

To really love the home you’re in and increase potential buyers’ interest, choose updates that will make living in your home easier.

For the small renovation budget of $3,000, you could complete any one of the projects below to boost the appeal, functionality and value of your home.

Add a covered entry

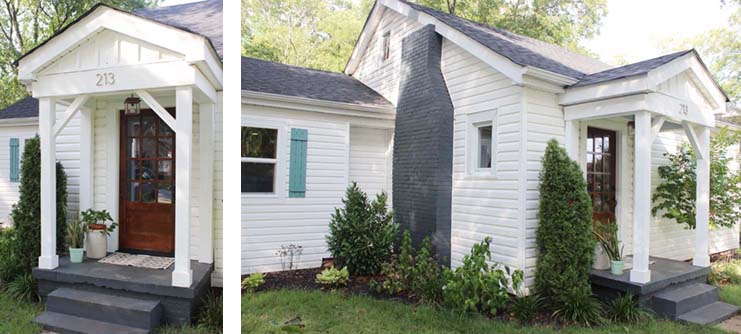
Many homes, especially older ones, don’t have a covered front door. Adding cover will not only greatly increase the curb appeal of your home, but also make your life easier. Say goodbye to fumbling for your keys in the rain with an armful of groceries.

A covered entry also offers guests a warm welcome, providing shelter while they wait at the door.

entry combo

Create an open floor plan

Much new home construction today makes use of an open floor plan. A home where one room flows into the next is convenient for everyday family life, and is also a huge advantage when entertaining guests.

Image 3

Creating an open floor plan in your home may be as simple as removing a wall. For a small investment, you can hire a contractor to take down a wall, creating a larger, more open space.

Homes with open floor plans often feel larger, which is a great selling point.

Upgrade to natural stone countertops

Whether you’re loving your home or selling it, one place upgrades have a major impact is the kitchen. Upgrading standard countertops can do wonders for the style of your kitchen, and also make the room more functional.

Image 5

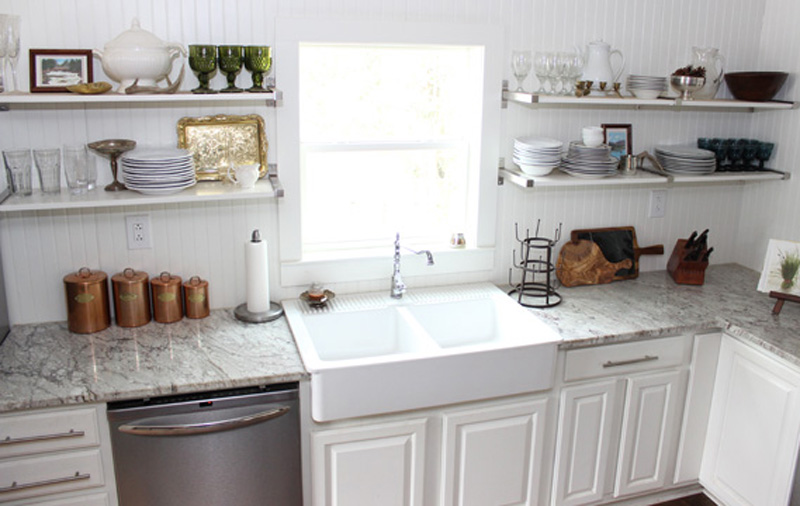
Natural stone countertops like granite are among the most durable on the market. Heavily resistant to scratches and high temperatures, they can stand up to anything you can cook up.

You can’t go wrong with any of these affordable updates. Each will make your home work better for your needs, and will be selling points for any future buyers.

Related:


from Zillow Blog - Real Estate Market Stats, Celebrity Real Estate, and Zillow News http://www.zillow.com/blog/3-home-upgrades-3000-budget-182561/
via Reveeo

House of the Week: Mid-Century Modern Home With a Wavy Lid

At the height of the mid-century modern craze, an East Coast architect named Jules Gregory built a studio on 10 wooded acres between New York and Philadelphia.

He and his wife then camped out beside it to determine which way the windows of their new home should face, and Gregory rendered a classic 1960 mid-century modern home — except for the roof.

The lid is all about the wave — or in architectural parlance, the curvilinear.

The roof’s center beam is actually straight, and it appears to have two cones rolling across it for a wavy effect throughout the home. “It’s basic geometry but also part of the poetry of the house,” said listing agent Dana Lansing of Kurfiss Sotheby’s International Realty.

The property is listed for $729,000, which includes the acreage, the 1,200-square-foot studio — or guesthouse, with 1 bathroom — and the main, wavy house with its 4 bedrooms and 2 baths.

Looking this groovy has made the home a party magnet as well. “It has a lot of incredible vibes to it,” Lansing said.

Related:


from Zillow Blog - Real Estate Market Stats, Celebrity Real Estate, and Zillow News http://www.zillow.com/blog/wavy-mid-century-modern-182167/
via Reveeo

Troubleshooting Houseplant Woes

Do you tend to kill every plant you touch? Rest assured that unless you make a habit of spraying your houseplants with weed killer, you’re not a plant murderer. At worst, you’re just guilty of negligence.

Whatever sad shape your houseplants are in, most can be speedily saved once you get to the root of the problem.

First, take a little time to get to know your plant so you can meet its unique needs. Learn its name, and say, “Hello, Ms. Spathiphyllum. Mind if I call you ‘peace lily’?”

shutterstock_45856564

Getting to know your plants will help you recognize problems and resolve them.

Now that the formalities are out of the way, do a quick search online or in a book to learn about your plant’s likes and dislikes. Your peace lily might like moist soil and bright light, for example, but not poor drainage and direct sun. Better move her away from that sunny windowsill and put her in a pot with a drainage hole.

The right treatment guarantees fewer problems in the long run, and once you’ve learned a little about your plant you can get started on fixing those issues.

Here’s a list of common problems and their solutions to get you back in good standing with your neglected houseplants.

Plant is dropping leaves

Diagnosis: Falling leaves are how your plant responds to stresses - both benign and harmful. Ficus trees, for example, are notorious for dropping perfectly healthy leaves at the drop of a hat (excuse the pun) whenever they’re moved to another room, but leaves that turn yellow and drop are a good sign that something is wrong.

Sniff the soil and look for any gnats. If the potting mix smells musty, then the plant is likely getting too much water. Overwatering rots the roots, causes fungal infections and forces the plant to drop leaves to conserve energy and moisture. Falling leaves could also be caused by cold drafts or low light.

Treatment: A plant with leaves that turn yellow and drop can be treated by ensuring that the top inch of potting mix dries out between waterings, that the pot has a drainage hole, and that the plant is away from any cold drafts.

To treat and prevent fungal infections, remove any fallen leaves immediately and make sure that the plant is getting plenty of air circulation. A small fan will help a great deal.

Plant is covered with weird stuff

Diagnosis: ‘Weird stuff’ is the best way to describe an infestation of scale insects or mealybugs. Mealybugs are usually seen as cottony balls of fluff, and scale insects are hard bumps that can be removed with a fingernail. Both suck juices from a plant and secrete a sticky substance called honeydew.

If there’s a fuzzy coating on some leaves, this is Botrytis, or gray mold. Powdery substance? That’s powdery mildew. Each of these problems can be enough to make you give up on houseplants, but don’t - there is hope.

Treatment: First of all, any infested plants should be placed away from other houseplants - in quarantine, if you will. You can remove mealybugs and scale insects by wiping all surfaces with a damp rag.

shutterstock_117271666

Wipe leaves with a damp cloth to remove mealybugs and scale insects.

To reduce serious infestations, remove the most severely affected leaves and spray the remaining ones with insecticidal soap according to the label instructions. If you have gray mold or powdery mildew, improve ventilation and use a systemic fungicide.

Leaves are covered with dust and webs

Diagnosis: Unless you haven’t bothered cleaning your plant in a few years, dust and webs mean you have spider mites. Spider mites are nearly too small to be seen by the naked eye, but can be identified by a dusty coating on the leaves that looks like specks of dark dots when brushed onto a sheet of white paper. You might also notice a thin webbing under the leaves.

Treatment: Remove spider mites with a damp rag, and prevent recurrences by providing more humidity and keeping the leaves clean. If the infestation is particularly worrisome, spray leaves with an insecticidal soap and wipe clean with a rag every few days. Plants with small leaves can just be sprayed.

Plant has gnats

Diagnosis: If you notice little gnats around your houseplants, these are fungus gnats. While the larvae of fungus gnats usually only eat decaying roots, they are a good sign that another problem, like overwatering, is at play.

Treatment: The presence of gnats doesn’t always mean that you’re overwatering, but does mean there are dead roots or other decaying organic matter in the potting mix.

First, make sure there are no fallen leaves on the surface of the potting mix. Then remove the plant from its pot and remove any soggy, rotten roots, before repotting in fresh potting mix.

Bad infestations can be treated by using BT or diatomaceous earth according to label instructions.

shutterstock_243032641

If gnats plague your plant, remove any rotten roots and repot the plant in fresh potting mix.

Plant has yellow leaves

Diagnosis: Yellow leaves could mean a lot of things, but you can easily narrow down the problem by answering a few questions.

First, where are the yellow leaves? If they are at the bottom of the plant’s stems, the culprit is usually overwatering or poor drainage. If they are in the upper portion of the plant, this could mean that there is either a nutrient deficiency caused by using hard water or not using the appropriate fertilizer.

If the leaves are distorted and have yellow mottling, streaks or patches, then the plant has a virus.

Treatment: Ensure that your pot has a drainage hole so that water won’t rot the plant’s roots, and let the top inch of the potting mix dry out slightly between waterings. Ensure that the plant isn’t located where it can receive cold drafts.

If the new leaves are yellow, try using filtered water from now on, or flush out minerals that have accumulated in the potting mix by placing the plant outdoors in the shade on a rainy day.

Plants with yellow leaves due to a virus should be destroyed, since there is no cure and it might spread to other plants. Think zombies.

Plant won’t bloom

Diagnosis: This means that your plant does not love you. Sorry.

In all seriousness, a plant that refuses to bloom usually just isn’t getting enough light.

Sometimes the problem is simply a matter of timing. For example, orchids usually need a period of rest and leaf/root growth before blooming can resume. Some plants, such as bulbs or cacti, only bloom once per year.

If the plant doesn’t bloom and also has deep green, lanky leaves and floppy stems, then it needs more light.

Treatment: If you’re sure the plant isn’t just one that blooms once a year, then slowly ease it into a situation with more light. Moving it into direct sunlight too quickly will burn the leaves and harm the plant, so move it across the room in phases.

shutterstock_227996875

Gradually moving a plant into stronger light can encourage it to bloom.

Today, you might move it to a nearby nightstand, and next week you’d move it to a dresser closer to the window, and so forth. It sounds silly, but a plant with scorched leaves looks even sillier.

Related:


from Zillow Blog - Real Estate Market Stats, Celebrity Real Estate, and Zillow News http://www.zillow.com/blog/troubleshooting-houseplants-182536/
via Reveeo

Thursday, August 27, 2015

Add Old World Elegance With Mediterranean Home Accents

The Mediterranean coast has always inspired travel envy, and it inspires decor envy, too. The natural combination of sea shores and exotic landscapes has a way of captivating the senses.

Whether or not you’ve traveled to Spain, Greece, Italy or Morocco, you can bring that Mediterranean flair to your home with these 10 accessories and design motifs.

Natural wood accents

Any natural wood elements, particularly exposed beams and wood floors, are key components of Mediterranean homes. Smaller rustic natural pieces such as driftwood add to the feeling of being just off the water, where the salt breeze texturizes the wood.

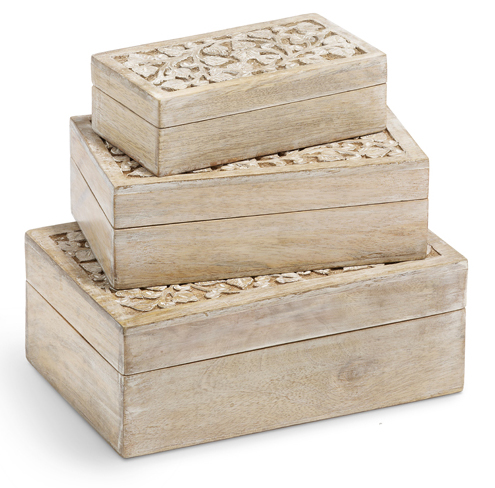
For a more portable addition, look for wood mirrors, sculptures, hooks and decorative boxes.

Terra-cotta pots and plants

Outdoor living is a key part of the Mediterranean lifestyle, and one you can easily emulate with plenty of plants, both indoors and outdoors. Hang them and place them on the floor in large terra-cotta pots.

Citrus trees add a particularly lovely component from the region - and will provide you with fresh lemons, limes and oranges to add to a pitcher of sangria, too.

Wrought iron

Wrought iron accessories - especially lamps, screens and wall hangings - will bring a slightly Moroccan flair. These are also reminiscent of the very common balconies and doors in the area’s open-concept homes.

Bright tile and mosaics

A key element of Mediterranean style is brightly colored tile and mosaics. Wall hangings, backsplashes, mirrors, frames and pottery made of brightly colored tile or a mosaic are a sure sign of the coast. A row of mosaic frames mingled with wood frames on a bookshelf is a perfect addition.

Romantic touches

A few romantic touches, such as sheer curtains to let in a nice ocean breeze and soft blankets nearby to fend off the chill, will make your Mediterranean-style home really come alive. Keep the blankets in a big woven basket near the couch, and add a bunch of lavender to the basket for a calming scent and touch of France.

Candles and mirrors

Similarly, candles and mirrors add romantic touches that evoke the spirit of a warm Mediterranean night. Mirrors reflect the warm candlelight and make your abode glow with the aura of a sunset over the sea. Try a large mirrored plate with white pillars on the center of the coffee table, or embellished votives lining a mantle.

Texture, texture, texture

Textured walls and building materials are a trademark of the building style in most Mediterranean countries. If you’re up for texturizing your walls, a sand or sky tone of tan or blue will suit the style nicely.

If not, add texture with pillows, rugs, and even ornate room dividers. Rugs in particular are a great way to add texture: mix and match woven seagrass with Oriental rugs to capture the essence of the entire region.

Add cushions

The bold furniture of the style can vary by country, but heavy, low pieces are always appropriate when topped with cushions, which are an easy update for existing furniture.

For a more Greek style, sleek solid-color cushions are ideal. For more Italian flair, try neutral striped cushions and more bare wood furniture. Of course, floor cushions are a great addition, too.

cushions

Courtesy of Zillow Digs.

Ropes, columns, statues, Greek key and scrolls

Details inspired by the history of these nations - such as ropes, columns, the classic Greek key design, and scrolls on rugs, plaster, wall hangings, decorative vases and more - will bring the sense of a unique antique find. Try braided drink coasters or columns as plant stands.

See more Mediterranean home design inspiration.

Related:


from Zillow Blog - Real Estate Market Stats, Celebrity Real Estate, and Zillow News http://www.zillow.com/blog/mediterranean-home-accents-182492/
via Reveeo

UPDATE: LeBron Sells His Miami Palace Like a King

UPDATE: Proving his King status, LeBron James has sold his Miami home for $13.4 million after buying the place for $9 million five years ago.

ORIGINAL POST 10/3/14: Now that LeBron James has gone home to play basketball for the Cleveland Cavaliers, he’s selling his other home - in Miami.

The NBA superstar led the Miami Heat to the finals four times before he opted out of his contract and rejoined the Cavs.

James bought his gated, waterfront Miami estate in 2010 for $9 million. Now he has staged and listed it for $17 million. With 12,178 square feet of living space,  including some in a detached guesthouse, the listing declares it “the most opulent estate in Miami.” It has a huge kitchen, a wine cellar, a movie theater and a private sun deck on the roof accessible from the master bedroom.

Throughout the house, glass doors open to covered terraces overlooking the pool and bay. A concrete dock has parking for two 60-foot yachts. It is an estate fit for King James. The only real question is: could the 6-foot 8-inch forward fit into any of the home’s four bathtubs?

Tomi Rose of Opulence International Realty holds the listing.

Photos: Opulence International Realty

Related: 


from Zillow Blog - Real Estate Market Stats, Celebrity Real Estate, and Zillow News http://www.zillow.com/blog/lebron-james-lists-miami-estate-161086/
via Reveeo

3 Home Improvements Even a Beginner DIYer Can Tackle

New homeowners rapidly learn an expensive lesson: The handyman costs money - and that running list of home fix-its adds up quickly.

Fortunately for beginner do-it-yourselfers, you don’t have to invest in a trunk full of tools for basic upgrades and fixes; most require minimal investment in time and equipment.

Taking control and transforming your living space into a reflection of your own personal taste can be both simple and rewarding. Try it this weekend with any of these straightforward home projects that even beginning DIYers can master.

Create open storage with floating shelves

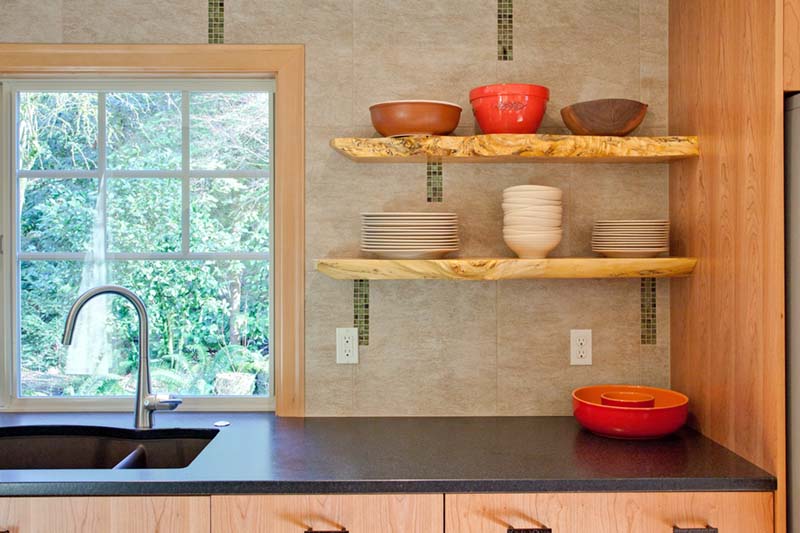
Sleek, open shelving is not only fashionable, but functional, too. Wall shelves are some of the trendiest additions in the homes of today’s DIY decorators, holding displays of cherished photos in the living room or bedroom and laden with dishes and bowls in the kitchen.

shelves

Courtesy of Fraley and Company.

The first step in installing this wall storage - or anything that hangs, for that matter- is to determine the composition of your walls. If the wall sounds hollow when you tap it with your fist, it’s likely drywall; if it sounds solid, it’s probably plaster.

For either, you’d ideally want to attach the shelf brackets securely to a wall stud, which can be located using a simple stud finder. If you can’t, affix it with anchors: hollow ones for plaster walls, butterfly or toggle varieties for drywall.

Now, measure and mark the spaces on the wall (on both ends) of where you want the shelf to go, and use a level to pencil a line across the wall where your shelf will sit.

Drill pilot holes into the wall for the anchors, and insert them following the manufacturer’s directions on the package. Then align your bracket with the anchor-filled pilot holes and mount using a regular screwdriver.

To finish, top your brackets with a simple shelf - glass, metal, or wood - and put your new storage spot to work.

Enhance energy efficiency and privacy with window film

While bright, sunny spaces can certainly be attractive, too much of a good thing can be bad. A flood of natural light fades rugs and upholstery over time, and causes air conditioning bills to skyrocket in the summer.

Fortunately, a compromise exists, and it’s stocked in the aisles at your home improvement store: window film. Applied directly to the glass, this thin polyester or vinyl layer can help shrink energy bills, enhance privacy, and even strengthen a window - all under the guise of a decorative touch.

window

Courtesy of Zillow Digs.

To adhere window film, spray both it and the inside surface of the window with a soapy solution. Stick the film to your window glass and then trim around the border, leaving about 1/16 inch between the film and the window frame. This will allow the window glass to expand and contract with changing temperatures.

Smooth out any bubbles in the film with a squeegee, and let it dry completely. After the few days it takes to cure, you can resume cleaning the tinted window once more - just stick to a soft cloth and non-abrasive cleanser to avoid scratching and prolong the film’s effectiveness.

Brighten with new light fixtures

Searching for a surefire way to dress up a room? Look up: Swapping out old, “builder’s special” light fixtures for something more stylish - a funky-modern chandelier or chic pendant lighting - can reinvent a space’s mood, all without the help of an electrician.

chandelier sm

Photo by Donna Dotan Photography, courtesy of Claire Paquin.

As with any electrical project, first flip off the lights and cut power to the room via the main breaker panel. Then, climb atop a sturdy ladder to detach the old fixture cover, remove wire connectors, and untwist the light’s wires from the main power wires. Finally, take down the remaining base or trim.

Next, new light fixture in hand, follow the manufacturer’s instructions for matching its wires to the main wires installed in your home. (Hint: Corresponding colors typically connect.)

Use a wire stripper to remove the protective coating from the ends of the light’s wires, then wrap each newly uncovered wire around the metal end of its match, and screw on the connectors. At the same time, attach the fixture’s grounding wire (often green) to the existing grounding screw.

Fold all wiring back into the electrical box, and use the new light’s included hardware to attach the fixture base or canopy over it.

Once you’ve screwed in the recommended bulbs, turn on the circuit at your electrical panel and flip the light switch to the fixture. When you’ve confirmed that it works properly, attach the trim and cover to your new ceiling light, and bask in the glow of your finished project.

See more home design inspiration for your next project.

Related:


from Zillow Blog - Real Estate Market Stats, Celebrity Real Estate, and Zillow News http://www.zillow.com/blog/3-beginner-diy-projects-182479/
via Reveeo

Wednesday, August 26, 2015

Putting Down Roots 40 Feet Up: Life in a Fire Lookout

They saw it coming: the mushroom cloud of smoke.

Dabney Tompkins and Alan Colley were on their deck enjoying the view when Stouts Creek Fire broke out earlier this month. They’d read about moments like this - spotting a forest fire from a 40-foot-high tower - but nothing could have prepared them.

They weren’t staffing a fire lookout, after all. They were at home.

Treehouse without the tree

Fire Lookout-2

Alan Colley (left) and Dabney Tompkins wouldn’t trade their life above the trees for anything.

Tompkins and Colley’s lives changed course on a ferry ride several years ago. Quite literally stumbling upon a book about fire lookouts used by the U.S. Forest Service, they learned how the structures on stilts were used to spot forest fires throughout the 20th century. Now largely replaced by satellites, very few lookouts are still standing.

Tompkins and Colley, who had downsized from their big Dallas estate to 1,400 square feet in Portland, wanted to know more.

“It was a magical moment that the book sort of fell off the shelf to us,” Colley recalls. “We called the ranger district and said why don’t we rent this thing? That was the beginning.”

The urbanites rented several fire lookouts before purchasing 160 acres of meadow and forest land in rural Oregon, known as Summit Prairie. With the help of a local builder and engineer, their “treehouse without the tree” was completed in 2010.

For the first few years, it was just a weekend getaway, but those weekends quickly turned into something more.

“About a year and half ago, we decided to be totally irresponsible and quit our jobs and move here,” Tompkins explains. “We were just going to do it for one year because we thought this might just be too isolated, too boring, too rustic. But then we got down here and we started to meet people and really enjoy the rhythm of it.”

Life on the prairie

Up four flights of stairs, the lookout is 388 square feet with a simple kitchen spanning the back wall and two narrow beds flanking the sides. Up a skinny wooden ladder, a “cupola” serves as a master suite - minus the bathroom.

In fact, there’s no bathroom to be found. Historic fire lookouts never had them, and Tompkins and Colley didn’t want to obstruct their 360-degree view of the Umpqua National Forest. Instead, they created a few alternative options and put the shower out on the deck.

“My favorite time to take a shower is when we have snow outside and you have to walk barefoot through the snow on the deck,” Tompkins says. “Then you turn that hot water on and that yin and yang of hot and cold - and looking out and seeing the meadow - it’s heaven.”

DSC_0028

Source: Alan Colley

Without the luxuries of a typical single-family home, Tompkins and Colley find themselves retreating to the “hammock tree” or soaking in their wood-burning, spring-fed hot tub.

“It’s quiet - so quiet it allows me to hear things I wouldn’t hear in the city,” Colley says. “There’s no urban beat. You don’t hear sirens, you don’t hear traffic - you hear us. There’s nothing like that.”

He says the experience has brought him and Tompkins closer, as they’ve allowed each other to grow and be different.

Fire Lookout-34

A taste of ‘off the grid’

They’re also learning what it truly means to live off the grid, finding you often gain more than you lose.

“The saying we love to tell each other is ‘just because we live off-grid doesn’t mean we have to eat bad food.’ And we have made some amazing meals,” Colley says after making a blueberry pie from scratch.

Instead of buying organic produce from the grocery store, they have their own garden and are involved with the local farmers market.

Of course, living off-grid has its challenges - like figuring out how to install solar panels - but the biggest challenge came as a surprise.

“We’re so enmeshed in this community, as weird as that may sound, that we really have to back away and say I just want time on my meadow,” Colley says.

From vegan potlucks with the “old hippies,” as they call the neighbors, to looking for ways to stimulate a local economy still dependent on timber, Tompkins and Colley are keeping busy.

The view that never gets old

They laugh when they think about how they used to worry about being isolated and bored.

“Reading, cooking, hiking and splitting wood are much more entertaining to us,” Colley says. “If you’re interested in those kinds of things as a DIYer, you’re going to be fine in this situation.”

And in the wake of a recent forest fire, they’re even more thankful for the view.

“Every day, the sun is doing something different. There’s no repetition at all,” Colley says.

“Many mornings, we’ll get up, and the entire meadow is shrouded in fog. And then as the sun moves up into the sky, the fog starts to kind of slip into the valley,” Tompkins adds. “As you look out, it’s like you’re in an airplane where there’s just this lower level of clouds. To me, that’s magic.”

Fire Lookout-15

Photos and video by Tom Hanny.

Related:


from Zillow Blog - Real Estate Market Stats, Celebrity Real Estate, and Zillow News http://www.zillow.com/blog/life-in-a-fire-lookout-182162/
via Reveeo